
In our house, almost every Friday night is Pizza Night. It’s a tradition I stole from my aunt who moved up to Boston and got all Yankee-fied on us but who still makes amazing pizza when she’s back in God’s country for a visit. I loved the idea of using dinner to make memories for my kids, and pizza is definitely easier than frying chicken with a toddler on your hip.
One of the best parts of Friday Night Pizza is we make it all from scratch. The dough…the sauce….I even grate my own cheese. There’s something about forcing ourselves to slow down and enjoy the process that makes these nights unique. Sometimes I do it all, no doubt because I’ve had enough trials on my patience already that day. But often, I let my girls help.

Once I gave a pizza dough making demonstration for my MOPS group. One of my ladies asked me how in the world I manage to do this with an (almost) toddler underfoot and three others causing various sorts of mischief the moment my back is turned. Honestly, I’m not really sure. Some nights are easier than others. Often we lock the baby in his booster and feed him renegade olives and cheerios. My husband helps. You just have to find the rhythm that works for you. How do you cook dinner on any other night? It’s the same, really.
step one:: the dough
You’ve got to have really awesome crust. Now, you can take what appears to be the simpler way out and buy Pillsbury, or you can trust me and make your own. Nowadays, whipping up a batch of pizza dough takes me as much time as opening the can of store bought. I won’t judge you if you go that route, but give this a try just once in your life to say you have, promise?
This recipe will make two large pizza crusts.
1. Pour 1 1/2 cups of warm water into a bowl. Sprinkle a teaspoon of active dry yeast over the water.
2. In an electric mixer, combine 4 cups all-purpose flour (or substitute 2 cups with whole wheat if you want to feel healthy) with 1 teaspoon of kosher salt. Kosher tastes better, believe me.
3. Turn mixer on to lowest setting and drizzle in 1/3 cup olive oil. By the way, I use my paddle because my dough hook died. It works fine. You can also do all this by hand, but don’t try a hand mixer. That won’t work. Just trust me.
4. Stir the yeast/water mixture until dissolved. Now, slowly drizzle it into the flour while the mixer is mixing. It will come together and make a sticky mass of dough. If dough seems too wet (isn’t sticking together) sprinkle in some more flour until it bonds.
5. Drizzle a couple tablespoons of olive oil in another large bowl. Remove the dough from your mixing bowl and form a dough ball with your hands. Work it out slightly from the center to the edges. Now, toss it in the large bowl and turn it to coat.
6. If I’m making dough for that night, I place a warm, damp dish towel over the bowl and let it rise in my microwave for the next 1-2 hours. Don’t turn the microwave on! If I’m making it for later in the week (which would require forethought, not my best feature) I’d cover it in plastic wrap and stick it in the fridge.
Need more help? Don’t worry The Pioneer Woman has all this in incredible detail with gorgeous photos. Now is when I credit her with this recipe.
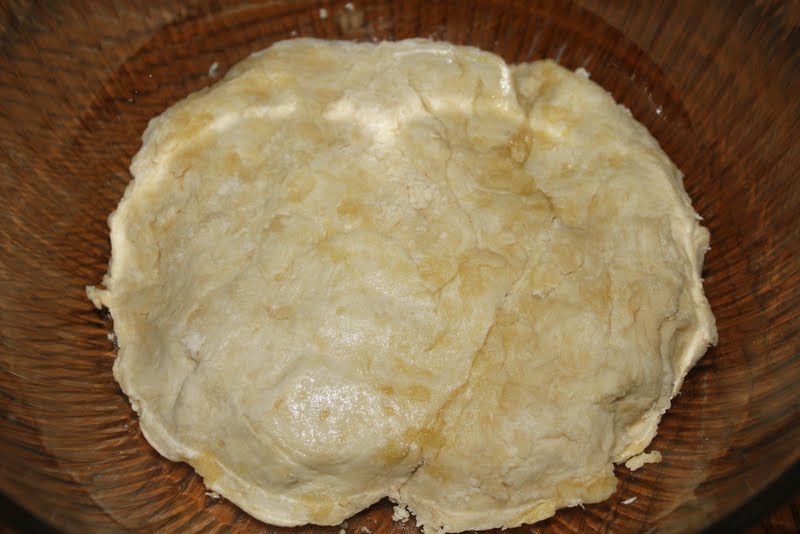
My dough just mixed…
…and now two hours later…
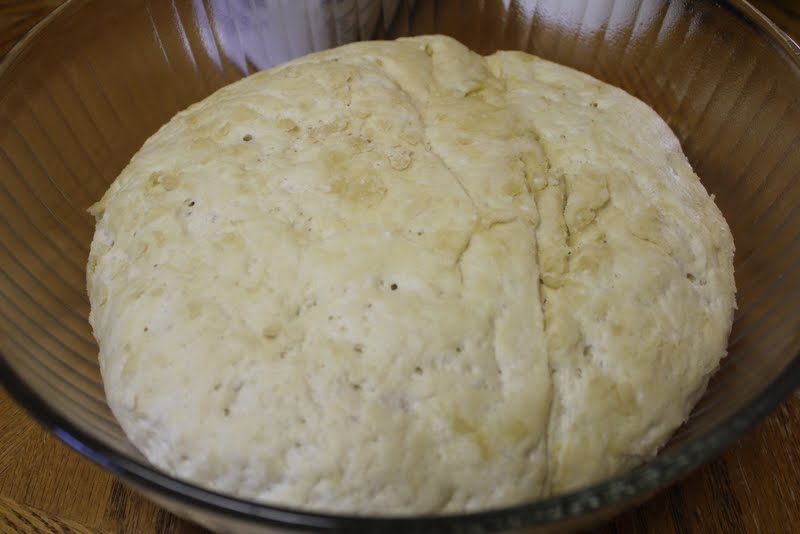
puffy and ready to roll.
step two:: the toppings
Assemble your ingredients. Now, here’s the beauty of pizza night. It’s your kitchen so you can put whatever you want on your pizza, and trust me, anything’s good. Once I made Summer Pizza with leftover squash, zucchini, and carrots. Last week I made this incredible concoction using cabbage. My husband’s favorite is when I have leftover ham from a big family dinner. Here’s what one Friday night looked like:
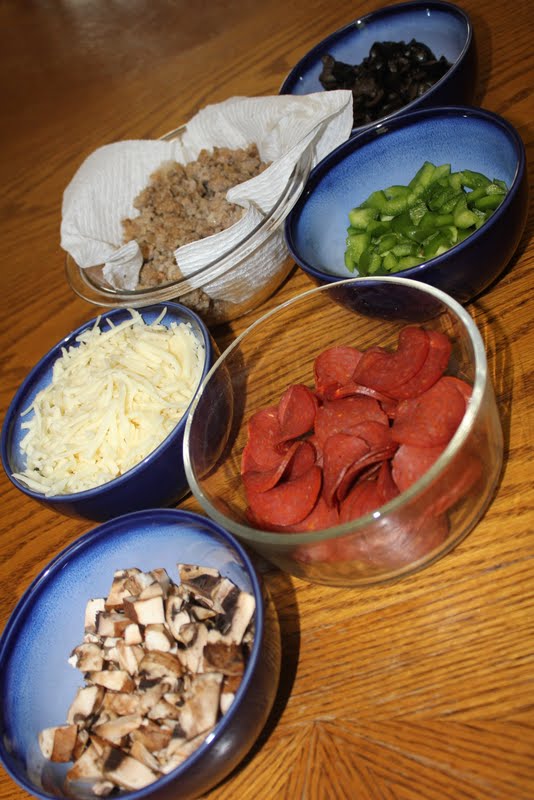
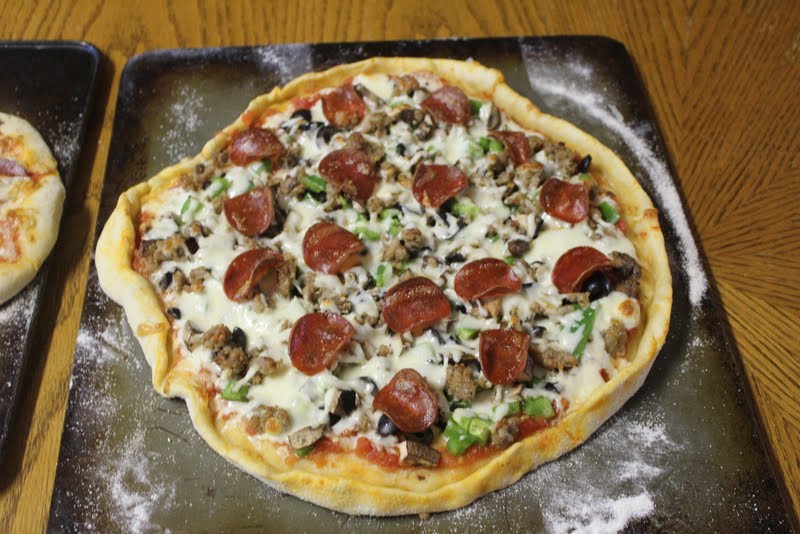
Mushrooms, green peppers, black olives (my weird kids love ’em), italian sausage and pepperoni. My cheese is a block of mozzerella I grated myself. I used to let my seven year old grate the cheese until the time she grated her knuckles. You get more if you grate it yourself, just in case you didn’t know.
step three:: the sauce
Just like toppings, pizza sauce comes in a variety of options. When my garden tomatoes aren’t drowning, I make an amazing homemade sauce from Simply in Season; you can read about it here. Most of the time, though, I heat a large can of crushed tomatoes and season to taste with oregano, basil, garlic, salt, and pepper. Simple, easy, and frugal.
step four:: the heat
Preheat your oven to 500 degrees. That’s right, it goes that high. If you have a pizza stone, put it in the oven to preheat also. If you don’t, go to Walmart and buy one. Or call your Pampered Chef representative. You won’t regret it.
step five:: the ready
Clear your space. I use my kitchen table because I’m too lazy to move things off my counter and it’s a better height for my girls to help. Then get out a cookie sheet or pizza board. My mom got me one for Christmas, and it was seriously my favorite gift. You’ll want to build your pizza on this to make the pizza to stone transfer easy. If you use a cookie sheet and don’t have a stone, you can just put that pan straight in the oven.
step six:: the crust
Sprinkle a generous amount of cornmeal over your work area. This will keep the dough from sticking. One dough recipe will make two large pizzas, so divide it in half to begin. I then take one half and divide it into thirds for my girls to make their own. They’re regular little chefs.

Now, place the dough in the center of your work area and begin flattening it.
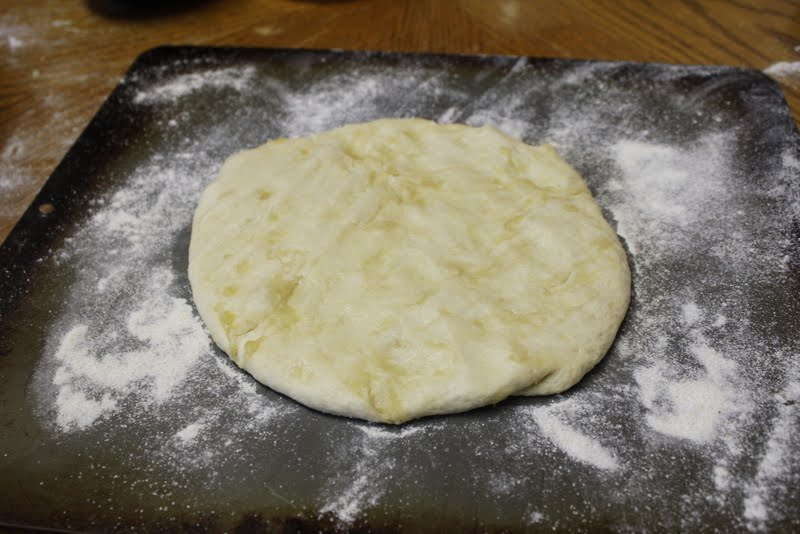
It’s going to be elastic-y and stretchy and will bounce back. That’s good, you did it right! Just keep working it. When it’s about six inches across, I get out the rolling pin and work from the center out.
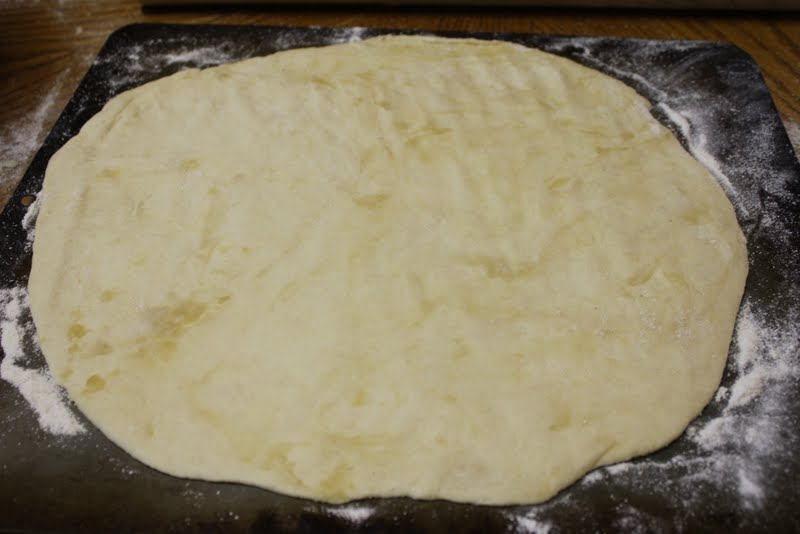
Thin pizza is lower in carbs, but won’t hold as many toppings, so use your judgement. It will puff up some in the cooking process. And those fingerprints? They help hold on the toppings.
step seven:: the pizza
Build it up. Spread the sauce to your desired taste, usually about a half cup worth. Then top with whatever makes you happy.
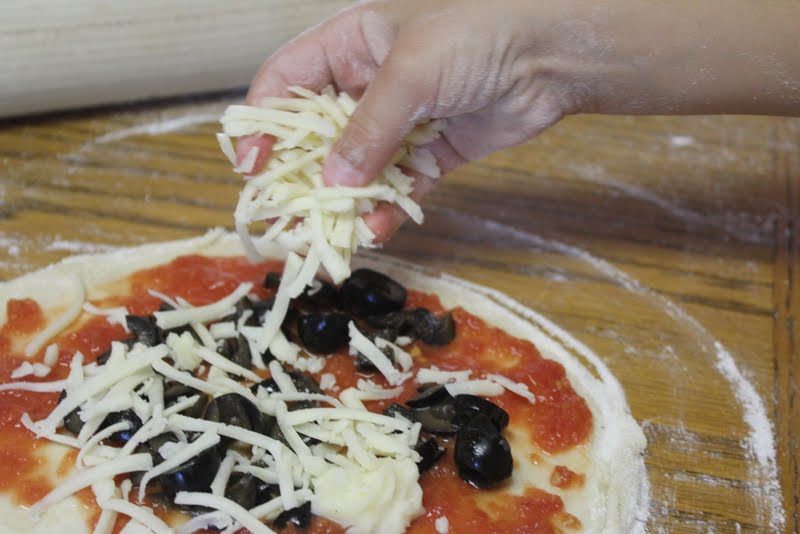
Here’s Annabelle putting on lots of cheese…

and here’s daddy’s pizza with everything under but the pepperoni. They get a little crisp when on top and I love that. I also pinched the edges of my dough up to create a thicker crust and hold in all that goodness.
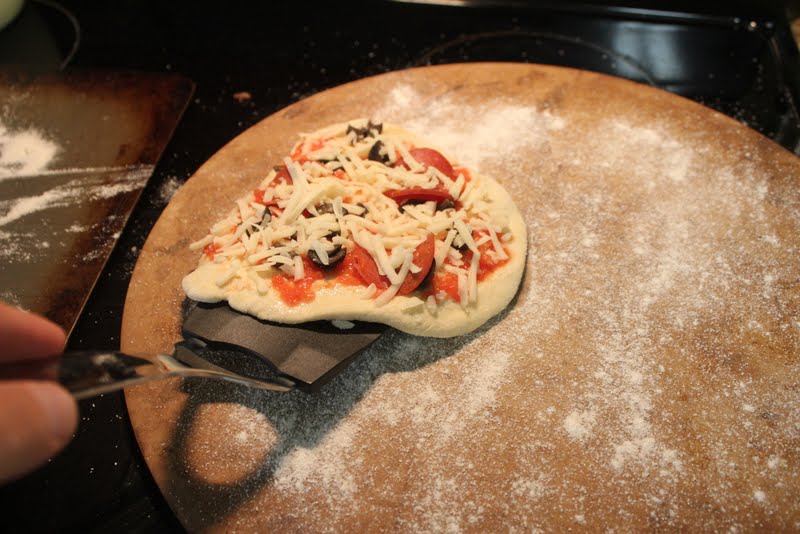
step eight:: the transfer
Don’t be scared. The secret is lots of cornmeal under the pizza dough and sprinkled onto the stone. Slide a spatula underneath and gently work the pizza from the cookie sheet or board and onto the stone. Once you get it going it should slide right off.
step nine:: the cooking
Cook in the center of the rack for approximately seven minutes or until cheese is melted and crust is golden.
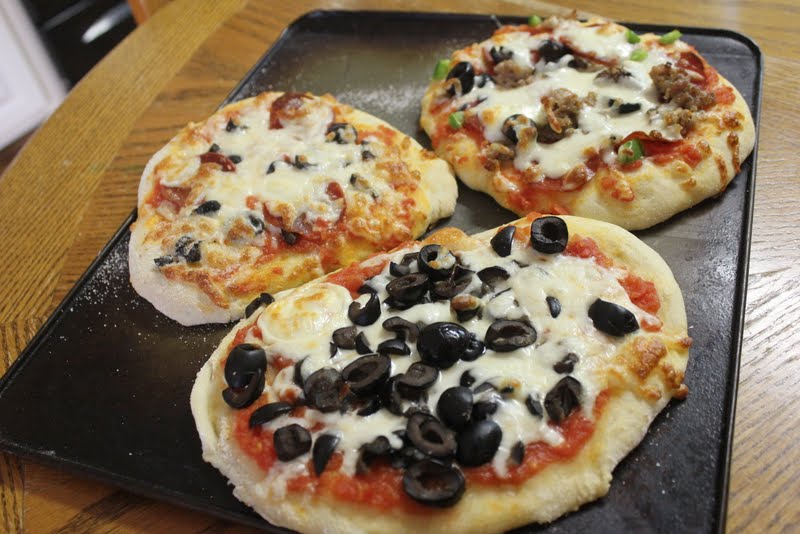
step ten:: the end
Enjoy! and post lots of pictures!
 |
| Yum! |
